Here I will show you how I animate 2D eyes using an eye texture on a 3D character model in UE4.
Note: This tutorial uses Blender. However, similar results can be reproduced with Maya.
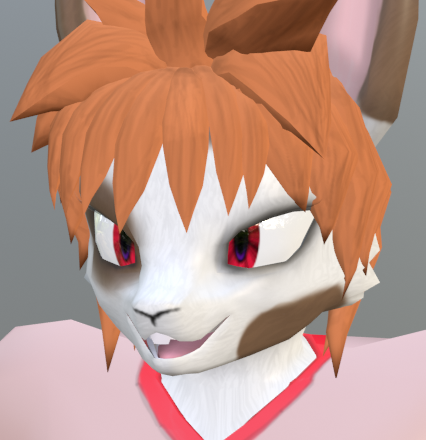
Part 1 – The Character Model:
-In Blender, Create an eye material for your character model. Give it the eye texture that you want to move around in game or in your animations. Apply the material to both of the eye geometries on your mesh.
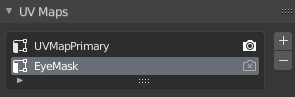
-In the Properties Editor under Mesh Properties, go to the UV Maps and create two of them, one for the Mesh’s general textures, and another just for the texture mask that we will discuss later.
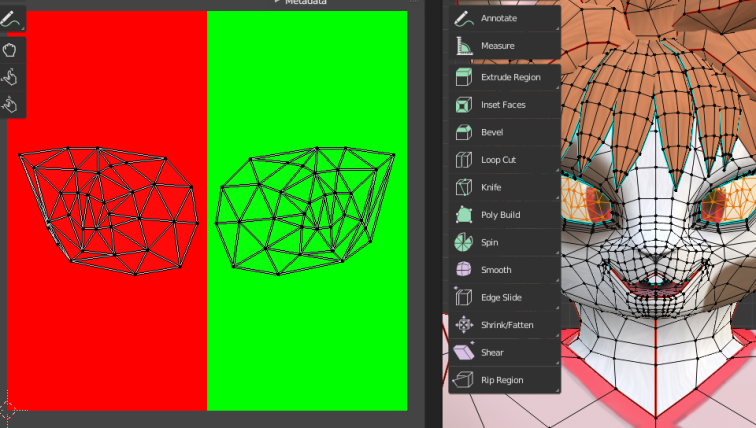
-Create the eye mask texture. Create the UVs for the eyes only for the EyeMask UV mask. It should look something like this.
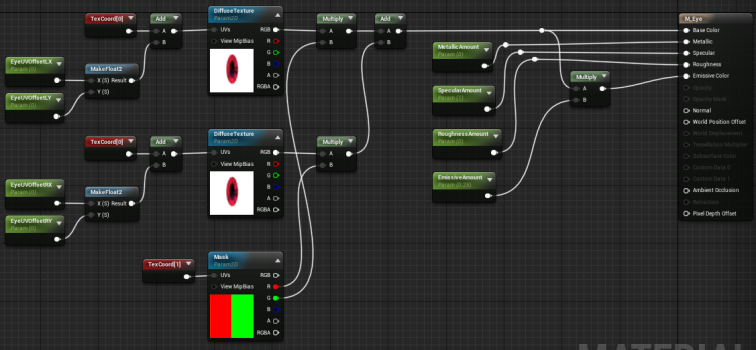
-In the material editor, add the following nodes (If it is too small to see, you can zoom in with ctrl+mouse wheel or right-click and save the image):
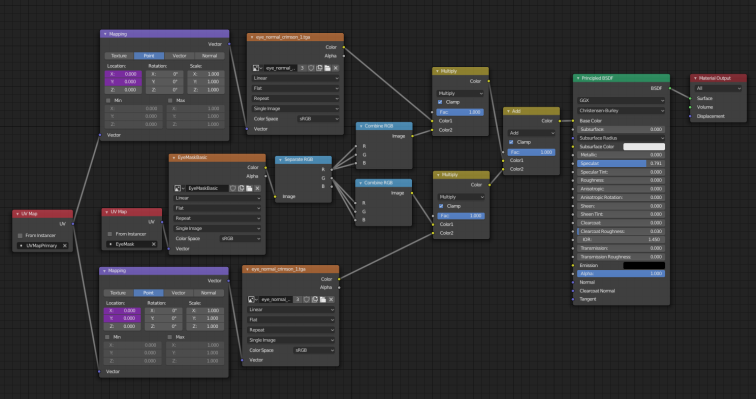
The nodes use 2 instances of the eye texture, and blends them with the eye mask texture which separates the left and right eyes. The results are added together and plugged into the Base Color. I would recommend studying this as we will be using the same logic in UE4 for the Eye Material.
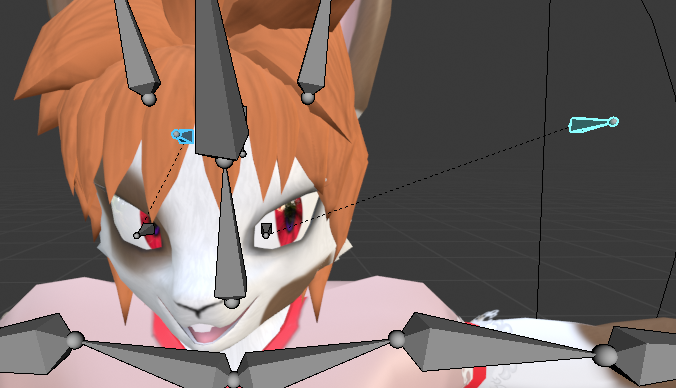
-If you have a keen eye, you will have noticed that the UV offsets in the material nodes were colored purple. This is because we will be using bone drivers to control the UV offsets. Add 2 bones for each eye in the Skeleton. The first bones will be parented to the head, and will act as a base position for the driver bones. The second bones, the driver bones, should be parented to and point in the same direction as the eye bones. However, the bones must not be connected.

-Apply the bone drivers to the UV offset parameters by right clicking on them in the Material Node view and clicking Add Driver. Select the Skeleton and the driver bone you wish to drive the UV offset. Select Local Position for the positioning. Do this for all the other UV Offsets parameters. You can adjust the equation to your liking. Test it out by going into pose mode and moving the driver bones around parallel to the eye bones.
-Now you are finished with the Blender side of things! Export the mesh as FBX binary with only the Skeleton and Mesh. Add your own animations and export them. For the animation FBX files, you only need the skeleton and the NLA animations. Import them all into UE4.
Part 2 – UE4 Bone Driver Setup
-From now on we will operate in UE4. In the Skeleton Asset, check to see that your driver bones are in there. One thing you will notice when playing the animations is that the eyes will not move. Unfortunately FBX files do not carry bone driver information over from Blender. You will need to re-implement it in UE4.
-The first step is to create the eye material. Create a new material and set up the nodes like so:
If you look closely, you will see that it looks very much like the set up in Blender. It actually uses the same logic as the Blender material. It uses the eye mask to separate the left and right eyes and uses UV Offsets controlled by Material Parameters. Apply the material to your mesh that you imported. The parameters on the right can be changed if you wish.
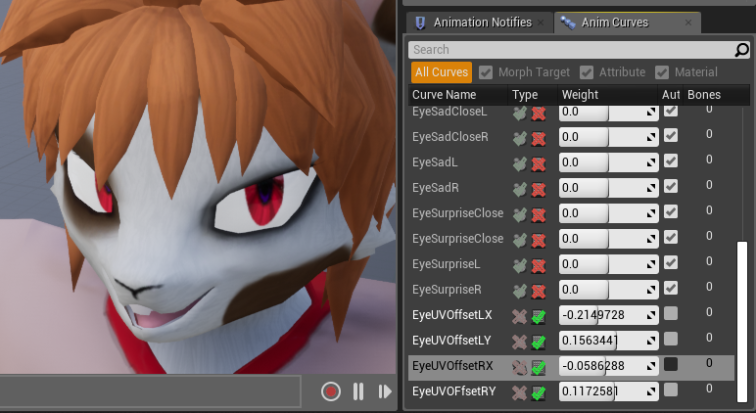
-Open one of the Animation Sequences for your mesh and add 4 new variable curves. Each curve should have the same name as the UV Offset parameter it should modify (This is important!). Now this is the weird part. You then want to delete the curves from the Animation Sequence Asset. Strange, I know, but the curves you just created will still exist inside your Skeleton Asset, which is what we want.
-Go back to your Skeleton Asset to check that they are still there. They should be in the form of Morph Targets. If so, change the Type to Material. Manipulate the Morph Targets to see them manipulate the eye UV Offsets.
-The next step is to link the driver bones back to the Morph Targets we created. Go into the Animation Blueprint if you created one and add the following nodes at the very end:
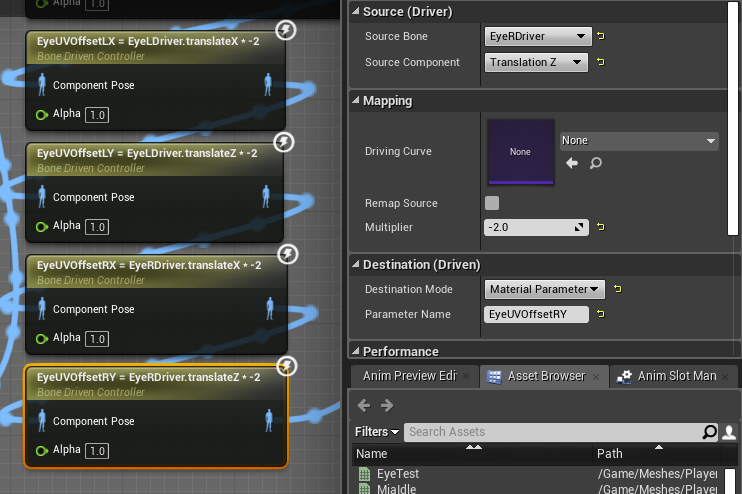
As you can see, I added one Bone Driven Controller per Material Attribute. The source bone is the driver bone you want, and the Source Component is the component you want to drive the Material Attribute. This is similar to creating bone drivers in Blender. The Multiplier is a scalar for the intensity. You can make it positive or negative depending on the coordinate system you want. You must choose Material Parameter for the Destination mode and type out the Material Attribute Morph Target you want to modify in the Parameter Name text box.
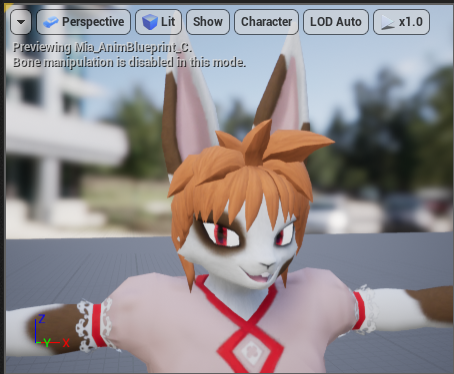
-Now the last thing to do is test that it works! Before the Bone Driven Controllers, plug in an eye animation Animation Sequence and build. Look in the preview to see if it is working. Now you are done! Congratulations! You now have the ability to use 2D Eye animations for your game!
Bonus: If you wish to also allow your Blueprints or C++ code to manipulate the eye movements, you can create an extra 4 Material Parameters for the UV Offsets and add them to the original UV Offsets.

This post is a Christmas miracle.
LikeLike
Glad to help!
LikeLike
thanks dude
LikeLike